
How to Move Bitcoin to a Hardware Wallet
Buying Bitcoin is only the first step. As long as your coins remain on a cryptocurrency exchange, the platform controls access to them.
If you plan to hold Bitcoin for many years, it’s recommended to move it to your own hardware wallet. That way, you control the private keys and have full ownership of your Bitcoin.
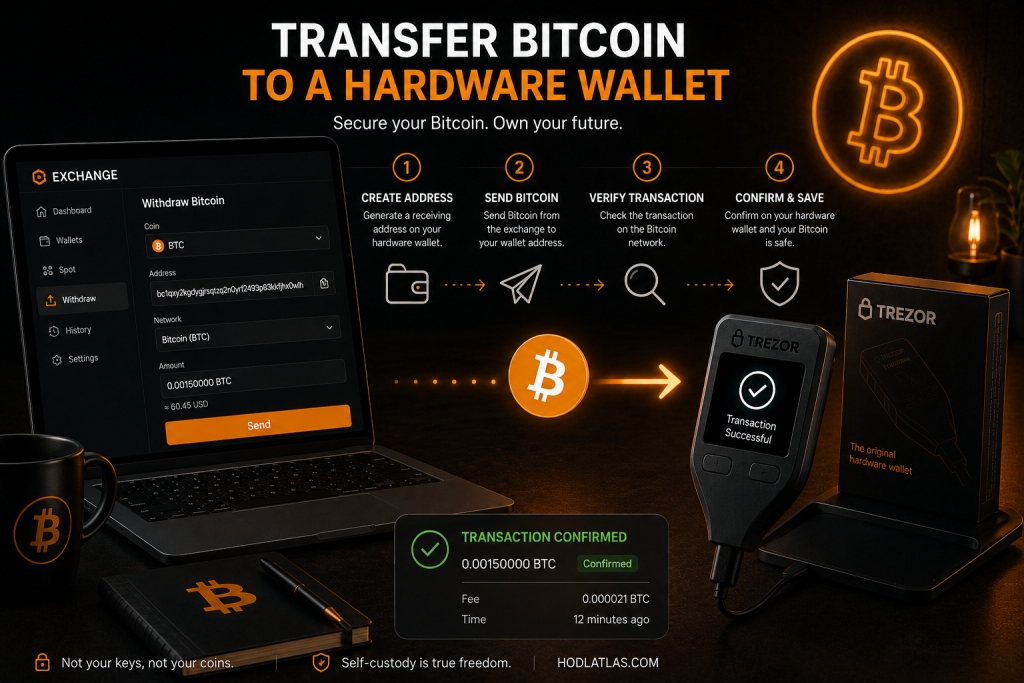
In this guide, we’ll walk through the entire process of transferring Bitcoin from an exchange to a hardware wallet.
What You’ll Learn
✅ Why you shouldn’t keep Bitcoin on an exchange for the long term.
✅ What to prepare before making a transfer.
✅ How to send Bitcoin correctly.
✅ Why you should always make a test transaction first.
✅ The most common mistakes to avoid.
Step 1. Prepare Your Hardware Wallet
Before making your first transfer, make sure your hardware wallet is fully set up.
Check that:
- the device has been successfully initialized;
- your recovery seed phrase has been written down by hand;
- a backup copy is stored in a safe place;
- you can open the wallet application.
Do not transfer Bitcoin until you’re sure your wallet is completely ready.
Step 2. Get Your Bitcoin Receiving Address
Open your hardware wallet application and choose Receive Bitcoin.
The wallet will display your Bitcoin receiving address.
It’s very important to verify that the address shown on your computer matches the one displayed on the hardware wallet itself. This protects you from malware that could replace the recipient’s address.
Step 3. Copy the Address
Copy your Bitcoin receiving address.
After pasting it into the exchange, double-check the first and last characters.
Never type the address manually—always use copy and paste or a QR code.
Step 4. Send a Test Transaction
If this is your first Bitcoin transfer, send a small test amount first.
For example, send the minimum withdrawal amount allowed by the exchange.
After the transaction is confirmed, verify that the Bitcoin has arrived safely in your wallet.
Only then should you transfer the remaining balance.
Step 5. Transfer the Remaining Bitcoin
Once the test transaction has been successful, repeat the process and send the rest of your Bitcoin.
Before confirming, carefully verify:
- the recipient’s address;
- the selected network — Bitcoin (BTC);
- the transfer amount;
- the network fee.
Remember: once a Bitcoin transaction is sent, it cannot be canceled or reversed.
Step 6. Wait for Network Confirmations
After you send the transaction, it will be broadcast to the Bitcoin network.
Depending on network congestion, confirmation may take anywhere from a few minutes to an hour—or sometimes longer.
Once the required confirmations are complete, your Bitcoin will appear in your hardware wallet.
Key Takeaways
✅ Always send a small test transaction first.
✅ Always use the Bitcoin (BTC) network.
✅ Verify the receiving address on the hardware wallet screen.
✅ Never share your recovery seed phrase with anyone.
✅ After the transfer, your Bitcoin is under your full control.
Common Mistakes
❌ Sending Bitcoin using the wrong network.
❌ Skipping the test transaction.
❌ Failing to verify the address on the hardware wallet.
❌ Storing your recovery seed phrase on your phone or in the cloud.
❌ Not creating a backup of your recovery seed phrase.
Support the Project
HodlAtlas is free, ad-free, and has no affiliate links to exchanges — the site runs on voluntary donations from people who found the tools useful. If you'd like to support its development, you can send any amount in Bitcoin.
likablehacksaw535@walletofsatoshi.com